lunedì 10 gennaio 2011

La casa che vorrei – le Scale

I lavori in casa hanno portato alla creazione di un nuovo spazio: la mansarda.
Prima di questa, raggiungevamo il tetto usando una scala a soffietto richiudibile sul soffitto del terrazzo. Adesso vorrei un modo più facile per accedervi. Il progetto prevede che questa rampa sia realizzata come prosecuzione della già preesistente scala da cui si accede ai vari appartamenti dell’edificio. E’ una classica scala in marmo e ferro (e granito). Sto pensando di rivestire le pareti della mansarda con il legno e creare un’atmosfera shabby & country. Il mio sogno sarebbe introdurre quell’angolo della casa con scale carine, insolite.

Volete aiutarmi?

Al momento, le pareti dell’attuale scala sono color crema. Mi piacerebbe mixare legno e ferro battuto, magari legno bianco.


Renovations have brought a new area in my home: the mansard.
Before it, we will reach the roof by an accordion ladder on the terrace. Now we need an easier way to get there. The project plans this flight to be continued on the pre-existing stairway leading to each flat in the building. It is a classic stairway, made of marble and iron (and granite). I am planning to cover the walls with wood, so I want to create a shabby & country atmosphere upstairs. My desire would be to introduce that “home corner” by means of nice, unusual stairs.

Would you help me?

At the present, stairs walls are cream/white. I’d like to mix wood and wrought iron, maybe white wood.


Una versione non bianca mi condurrebbe a qualcosa come la scala nella foto sotto:

A not white versione would lead me to something like the following pic:

Ho raccolto così tante immagini sulle scale, quindi ve le razionerò… :)

I have gathered so many stairs pictures, so I will ration them… :)

giovedì 6 gennaio 2011

I miei primi fingerless “gloves”

Vi ricordate di questo? il mio primo capo semplice semplice, una fascia colorata a cui, avevo promesso, avrei aggiunto degli accessori. E l'ho fatto. Per l’esattezza lo scorso inverno, ma non li avevo mai fotografati.
Il modello è quello dei Green cabled arm warmers, logicamente non potevo privarmi delle trecce!

Do you remember it? my very first item of clothing, really easy, a large colourful band to which, I promised, I would have added some accessories: And I did. To be exact, last winter, but I hadn’t taken any photos.
The pattern is taken from  Green cabled arm warmers, logically I couldn’t deny myself cables!

A tal proposito, sto pensando di disfare la fascia per destinare questa bella lana colorata a qualcosa di migliore, sempre smanicato ma più carino. Cosa ne pensate? Suggerimenti?

By the way, I am thinking of unpicking the band project to knit something better, still sleeveless but prettier. What do you think? Any suggestion?

lunedì 3 gennaio 2011

La nuova rubrica del lunedì: La casa che vorrei - The home of my dreams

Complice la ristrutturazione in casa, sono settimane che mi perdo nei meandri di blog e siti e chi più ne ha più ne metta a tema “casa dolce casa”.
E perché non propinare anche a voi le idee e le immagini raccolte in giro? per cui è deciso: una nuova rubrica…che dico? la prima.
Nome: “La casa che vorrei”
Quando: ogni lunedì

Home renovations playing their part, I have been getting lost for weeks among blogs and websites and more looking for… “home sweet home”.
So why don’t share with you ideas and images gathered around the web? so I made this decision: a new column…what am I saying? the first one.
Name: “The home of my dreams”
When: every monday

Inauguriamo con alcuni esterni. Di neve ne abbiamo vista tanta, quindi si parte con gli…

We will start with the outside. We have seen lots of snow, so we will open this new “column” with…

SNOWY COTTAGES

 Quaint


www.flickr.com


www.weheartit.com

martedì 28 dicembre 2010

TB6 Pompom Cowl – Free Pattern


DISPONIBILE IN INGLESE/ITALIANO
AVAILABLE IN ENGLISH/ITALIAN


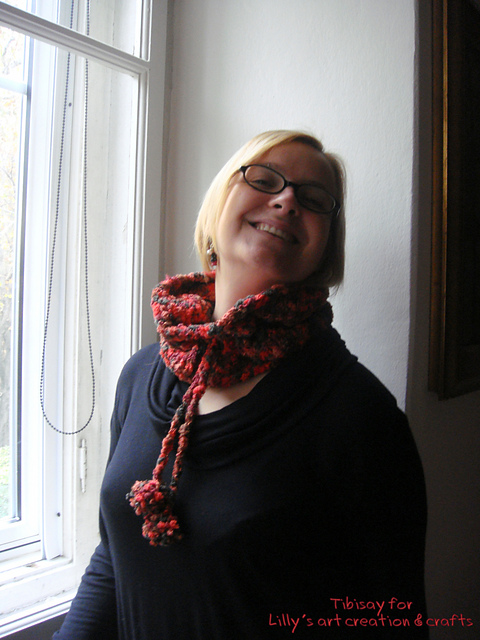
Questo è stato un regalo speciale per una donna speciale.
Ho pensato a lungo alla possibilità di condividere il pattern con voi per realizzarlo. E alla fine ho pensato che a lei avrebbe fatto piacere che il mio primo schema reso pubblico fosse a lei dedicato.
A lei, alla sua allegria, alla sua amicizia, ai suoi post sempre scanzonati, all’affetto sincero, alla sua disponibilità e ospitalità, e per me è come se la conoscessi da sempre.
il modo migliore per ringraziarla per tutto questo era un piccolo pensierino per il suo compleanno :)
Lo scaldacollo è di facilissima realizzazione.
This has been a special gift for a special woman.
I have thought long about the possibility of sharing the pattern with you to knit it. Finally I have decided she would have appreciated that my first official public pattern was dedicated to her.
To her, to her friendship, to her easy-going posts, to her honest affection, to her helpfulness and hospitality, that I can say it’s like I’ve known her for ages.
The best way to thank her was a little gift for her birthday :)
The cowl is very easy to knit.

TB6 POMPOM COWL – SCHEMA
Lana: Blob, manifattura primavesi
Ferri circolari: 10
Avviare 50 maglie. Preparare le maglie sul cavo per iniziare a lavorare in tondo (io ho usato la tecnica del magic loop), altrimenti è possibile usare un cavo della stessa circonferenza dello scaldacollo.
Giri 1-16: lavorare a diritto tutte le maglie.
Giro 17: (lavorare 2 maglie insieme a diritto, un gettato) fino alla fine del giro
Giro 18-33: lavorare tutte le maglie a diritto.
Giro 34: chiudere le maglie.
Realizzazione del cordoncino: tagliare 3 fili della stessa lunghezza dal gomitolo, calcolando la misura in base all’altezza da cui vogliate che pendano i pompom.
Lavorate i 3 fili come se voleste realizzare una treccia sui capelli. Create 2 nodi alle estremità per bloccare la treccia.
Creare 2 pompom (un tutorial chiaro lo trovate qui) 
Inserire il cordino intrecciato nei buchi creati a metà scaldacollo (inserendo l’estremità una volta verso l’interno dello stesso e una volta verso l’esterno) fino a quando il cordino abbia fatto il giro di tutta la circonferenza.
A questo punto non resta che cucire i pompom alle due estremità del cordino.
Non necessita di bloccaggio.

TB6 POMPOM COWL – PATTERN
Yarn: Blob, manifattura primavesi
Circular needles n°10
Cast on 50 stitches. Get your stitches ready on the cable to start working in the round (I used the magic loop method), otherwise you can use a cable whose lenght is the same one of the cowl circumference.
Rounds 1st-16th: knit all stitches.
Round 17th: (knit 2 stitches together, yarn over) to the end of the round.
Round 18th-33th: Knit all stitches.
Round 34th: Bind off.
Work the string: cut 3 threds of the same lenght from the ball of yarn, the measure will depend on how long you would like to have your string with pompoms around the cowl.
Work the threds as you are plaiting someone’s hair.
Make 2 pompoms (you might use this tutorial)
Put the string into the holes made on the cowl (putting the tip once inwards, once outwards alternatively) until the string has wrapped all the cowl around.
Sew the pompoms on the tips of the string.
You don’t need to block it.

venerdì 24 dicembre 2010

Buon Natale e…grazie!

E con questi ultimi pacchi consegnati vi auguro buone feste.
Queste sono le confezioni che ho scelto per quest’anno, finalmente posso mostrarvele!

And with the last packets delivered I wish you Season’s Greetings.
These are examples of my packaging solution this year, finally I can show them to you!

Grazie a tutti per aver regalato handmade in questi giorni, non solo Lilly’s ma l’opera di qualunque creativa. Promuoviamo l’unicità e la bellezza dell’artigianato.

Buon Natale e buon anno a chiunque passi di qui :)

Thanks to everyone for having chosen handmade gifts for your friends and relatives, not only Lilly’s but creations made by any creative crafter. Let’s promote the uniqueness and beauty of handicraft.

Merry Christmas and a Happy New Year to anyone who pops in :)

martedì 14 dicembre 2010

Feltro, stoffe, nastri e…il mio primo esperimento ufficiale: il kit portacucito

Oggi vi voglio parlare dell’ultima mania che ha riempita le mie giornate passando finalmente da pura fantasia e desiderio a realizzazione: il cucito creativo.
Tutto è nato da un’offerta su una macchina da cucire Singer coi punti principali più qualche motivo decorativo, essenziale e già sufficiente per cominciare a cimentarsi con ago e filo in modo serio.

Today I’m gonna talk about my last quirk, that has filled my days ceasing to be just imagination and desire and becoming reality: creative sewing.
Everything started with an offer on a Singer sewing machine with the main stitches plus some extra decorative ones, essential but enough to start trying with needle-and-thread seriously.


il filo legato così………………………………………………… o così……… :)


Apriamo la porta….welcome: home sewing!        …e questo è il retro!

Sono stati giorni di “studio” e di ispirazione continua. Fra queste, spicca fra tutte l’estrosa e geniale Elena Fiore. Ho preso anche il suo libro “Feltro e pannolenci”, giusto perché siamo in inverno e non vogliamo farci mancare niente, mica possiamo lavorare del semplice cotone noi creative compulsive.
Dopo aver divorato tutte le schede del libro ho tratto le mie conclusioni: ispira di qua ispira di là ecco che ti faccio un kit portacucito, sulla falsariga del portadocumenti di Elena (in basso a sinistra nella foto sotto).

These days I’ve been “studying” and taking inspiration all the time. Above all, I’m fond of Elena Fiore, creative and brilliant artist. I bought her book “Feltro e pannolenci”, just because we are in winter and we can’t miss anything, we obsessed creative people can’t just work simple cotton.
After reading and reading all its pages I came to my conclusion: “inspiration here inspiration there, I’m gonna make a sewing…home!”, based a little bit on Elena’s document case (at the bottom, on the left, picture below)

Picture by Elena Fiore

Ebbene, lo vogliamo togliere questo filo????

Non mi piacciono le cose semplici, quindi aggiungo qualche nastro, qualche pompom, qualche filo colorato…e riesco in qualche modo nel mio intento.
Ovviamente non potevo rinunciare alla maglia, quindi via di fiorellini, tasche e i-cord…
Ho iniziato ad usarlo ed è davvero più funzionale di quanto credessi (adesso è decisamente più pieno di come mostrato in foto!)

I don’t like easy things, so I added some trims, some pompoms, some colourful threads…and I got what I wanted to do, more or less.
Obviously I couldn’t give up knitting, so why don’t make some flowers, pockets, i-cord…
I started using it and it’s more functional than I tought (now it’s bulging, more than the picture shows!)

Ecco qui sotto ancora alcuni particolari…Tutti i quadrati che vedete nelle foto, di qualunque materiale, sono tasche!

Here we have some details…alll the squares you can see in te pics are pockets!


       A sinistra l’i-cord porta nastri fermato  
      con una pallina di feltro, sopra il tetto
      della casetta in copertina con un
      taschino porta caminetto (nastro,
      bottone o chicchessia!)


Prestissimo altre creazioni feltrose già pronte!

Soon, other felt creations already...ready! :)

lunedì 29 novembre 2010

Wool Bangles

Ancora lavori degli anni passati… per essere esatti, un paio di inverni fa si era diffusa la moda dei Wool Bangles, i bracciali rigidi rivestiti di lana lavorata a maglia rasata, con trecce o qualunque altro punto. Io non potevo di certo tirarmi indietro…ed ecco dunque i miei primi esperimenti (adesso ho perfezionato la tecnica, e presto vi mostrerò nuove foto!)
Partiamo con il “mare d’inverno", bangle realizzato per una mia cara amica a punto riso (il mio amato punto riso!)

Here we comes with old projects I hadn’t showed you yet… exactly, two years ago Wool Bangles were very popular. They were bangles wrapped with knitted wool, in stockinette st., cable st. and any other stitch. I couldn’t avoid trying and making some of them…these are the results (now I’m getting expert, new photos soon!)
Let’s start with “the sea in winter”, bangle knitted as a gift for my best friend in seed stitch (my lovely seed stitch!)


Questo invece è mio! Lana con filo in lurex per questo bracciale che dà un leggero tocco scintillante ad un abito nero così come ad un paio di jeans. Il colore del filato lascia poco intravedere la lavorazione, ma si tratta di tante piccole trecce, - che te lo dico a fare - altro mio grande amore.

This one is my mine! Lurex yarn for this bangle which makes any black dress sparkling as well as a pair of jeans. The colour of the yarn makes it hard to recognise the stitch: there are little cables, my second passion together with the seed stitch.


Piccola parentesi…mentre in quel di Trieste si svolgeva il secondo Stitch and Spritz, io andavo a trovare la Banda della Magliaia alla Feltrinelli di Palermo, per il loro incontro mensile (ne avevo già parlato l’anno scorso qui) e conoscevo amiche nuove di zecca e blogger già note, come Rosalba.

Little digression…while in Trieste the 2nd Stitch and Spritz was taking place, I was going to Palermo where, in Feltrinelli library, the “Banda della Magliaia” knitting group was having its monthly meeting (I had already talked about it here). I met new nice people and bloggers I had already met on the web such as Rosalba. 
 
Il mercoledì ci si incontra in un locale nel centro di Palermo dalle 20 alle 22, chi fosse interessato a partecipare, contatti pure le ragazze tramite la pagina di Facebook oppure scrivi qui a me e io recapiterò il messaggio.

Every wednesday they meet in a place in the town centre from 8 to 10 pm, who would like to join them (us!), please contact their facebook page or ask me and I will leave them a message in behalf of you.

Related Posts with Thumbnails